This was a job I have been putting off!
Boot lock
First I marked the centre of the car (this is not as easy as it sounds!), then using the lock, handle and striker plate, I marked the square bar position in relation to the top of the striker plate (at this stage it is not possible to work out the hole location in the boot lid).
 |
| Centre line marked |
The round bar on the striker plate was aligned with the edge of the square bar to the left of the centre line, so it was about 2.5 mm off centre (to the near side of the car) of the square bar.
 |
Centre line with striker plate located. The striker bar looks further away from the centre line than it is.
The distance is half of the square bar to the near-side of the centre line. |
An undersize hole was then cut (in case I made a hash of it) with the Dremel, where the claw of the lock would go. The striker plate was fitted to the car with button head screws and nylock nuts.
I then climbed in to the boot to mark out the position of the lock mechanism. The position was identified by hooking the claw around the striker plate bar and getting Carol to press lightly on the boot lid from outside (she let me out eventually). The lock fixing holes were then marked and drilled. After fixing the lock in place with self tapping screws, a 3 mm pilot hole was drilled in the boot rib, using the square hole in the lock as a guide.
 |
| Lock first fit and pilot hole drilled through boot rib |
The pilot hole was opened out to 10 mm using a stepped drill, to avoid chipping the gel coat. A hole was then drilled through the outer skin, using a 3 mm bit from the boot side, which emerged very close to the centre line. Using the pilot hole, the external hole was then drilled to 20 mm.
 |
| The two holes (one in the outer skin and one in the inner skin) can be seen in the boot lid. |
The outer skin hole was opened up to centralise and locate the handle. The slots were cut for the locating lugs. The handle was fixed with the two self tapping screws after the square bar was pushed through the lock.
 |
| Loosely fitted handle, square bar (too long at this stage) and lock. |
The square bar was marked then removed with the handle. It was then trimmed to the marks so that it was flush with the lock. The lock was then finally refitted and the handle put in place.
 |
| Lock fitted in place and tightened up |
A small amount of silicone was applied to the handle fixing, before final location. Nice feel when closed and locked!
 |
| Handle fixed in place |
Whilst I was at it, I fixed the number plate light, where the chrome cover would not tighten up - the thread had stripped. Here I super glued a standard nut behind the hole on the light unit. The fixing bolt was then put in place and tightened.
Bonnet rubber strips
This was an easy win!
The black sealing strip was fixed in place, using the self adhesive backing. It is not a continuous run around the bonnet shut line, but rather three separate strips. This apparently allows some ventilation and avoids the bonnet being raised too much above the body line, which a continuous run would do.
The edge closest to the windscreen was run from the edge of the curve of the bonnet shut line on the off side, across the car, so that it was equal length from the near side corner. See photo below.
The side strips were then cut to the same length as each other and fixed to the shut line from the end of the corner nearest the windscreen, towards the front of the car. See photo below.
 |
| Rubber seals in place |
This raised the bonnet very slightly, but with a slight compression it allowed the locks to operate and close without any free play. Sorted!
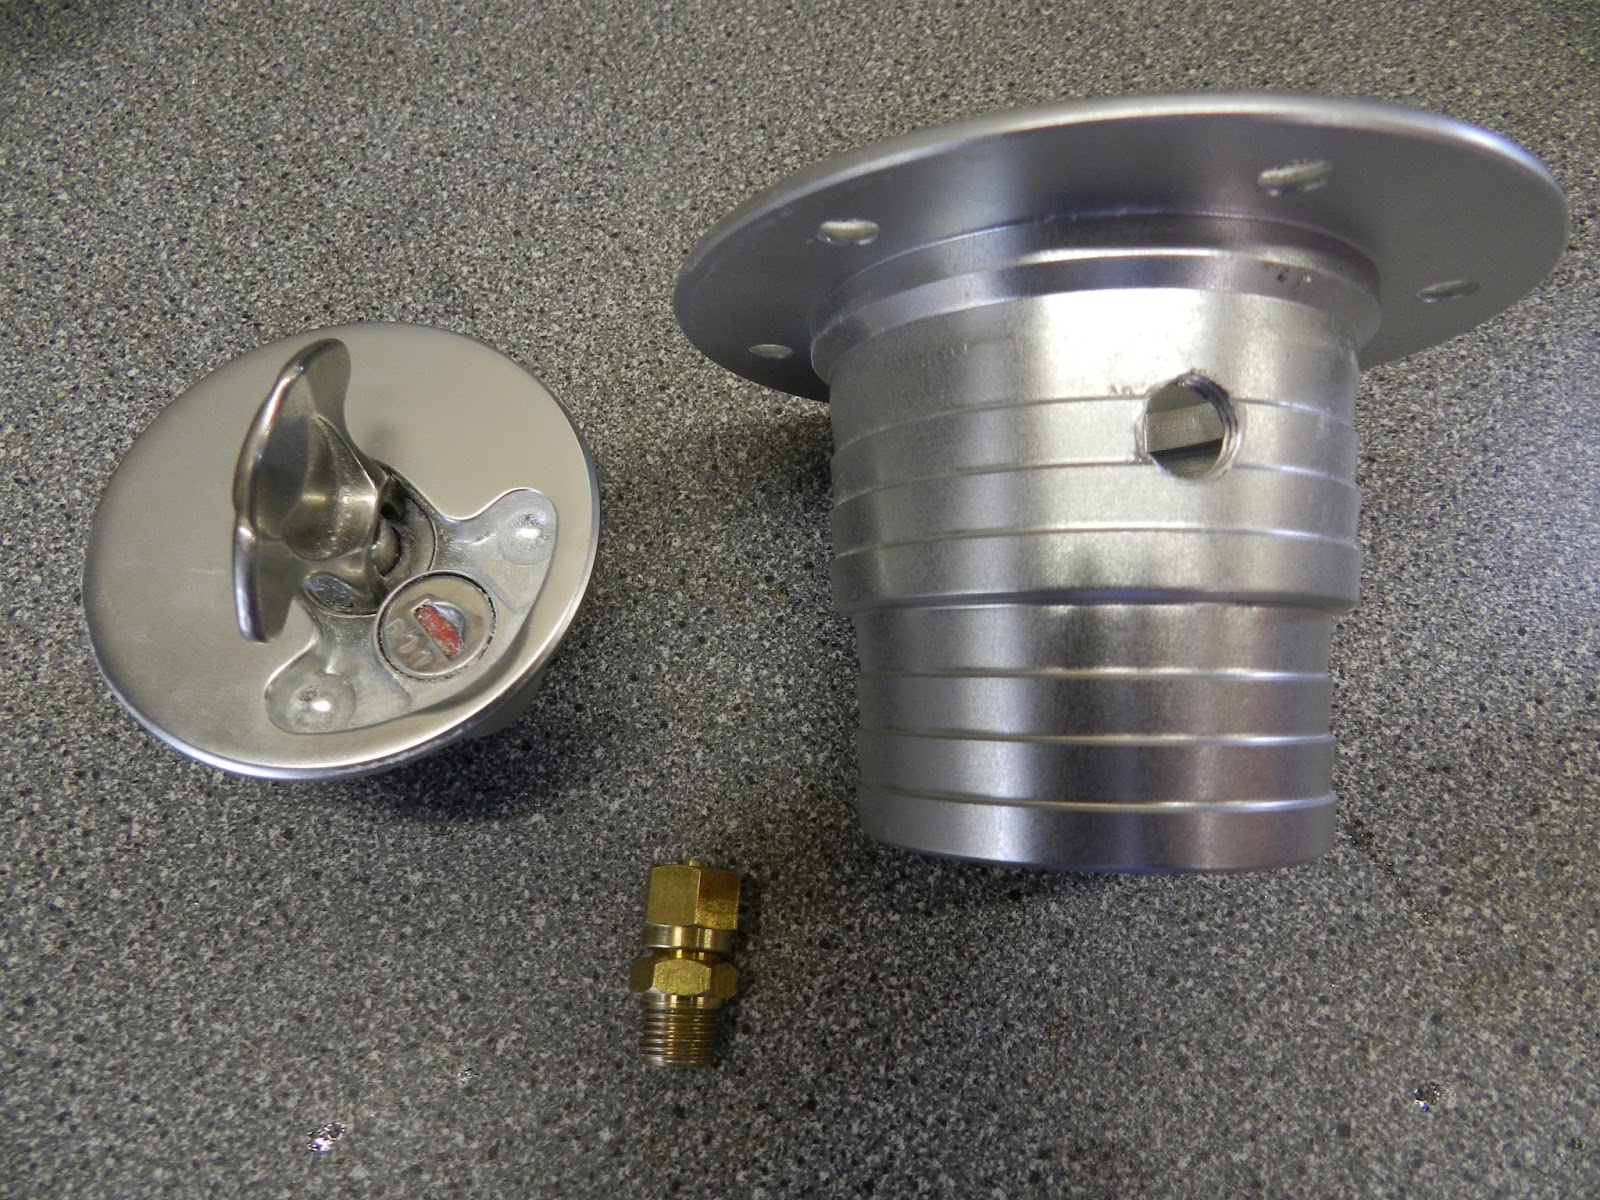
Fuel filler breather
A breather adapter was required for the fuel filler.
An 8 mm hole was drilled in the neck of the filler. Care was needed when selecting the position so that the cap would still fit and lock once the breather adpter was in place. The hole was tapped to 1/8 NPT. This may seem an odd thread, but I had a tap already in my Draper metric tap and die set!
 |
| Filler, cap and adapter |
The filler cap was put loosely in place on the body. A small amount of nut lock was applied to the thread of the fitting before it was screwed in place.
 |
| Breather hole can be seen in the neck |
The filler was rotated so that the breather was facing towards the drivers door, before fixing with the six fixings provided.
 |
| Breather position viewed from inside the boot towards the off-side rear wing |
Copper pipe brake pipe will be added later. This will need to be in an 'S' shape and use the compression fitting of the adapter. The other end will go through the boot floor - I need to remember to keep it away from the exhaust or Mr IVA will not like it. Don't think I would either if it ever vented fuel out there!


No comments:
Post a Comment