Thursday, December 17, 2015

Fitting the release bearing and bellhousing

Fitting the release bearing

The gearbox was lifted out of its box using the engine hoist. The hydraulic release bearing was located over the gearbox output shaft, with the outlets aligned with the slots in the gearbox. The release bearing was bolted in place with the two M6 set screws supplied. Both screws had locktite applied. The top hose is the bleed pipe.

Release bearing in place
The clutch release mechanism is a modified (by GD) hydraulic bearing, with braided hoses fitted. If a non-modified hydraulic bearing is used, you can't fit the braided hoses using the 90 degree connector!

To clear the hydraulic pipes, the gearbox holes needed opening out a little, so I used a burr in the drill to achieve this.
Slot opened a little in the gearbox
A SMALL amount (and I mean small, a smear is enough) of white pipe sealer (such as Loctite 572) is applied to the male end of the pipe fittings. As I didn't have any at the time, this delayed the mating with the engine.

Fitting the bell housing

The bellhousing was attached to the gearbox, using seven new high tensile bolts. These bolts were thread locked too.
Bellhousing attached to gearbox
The flexible hoses were still accessible to allow the Loctite 572 to be applied before the hoses were secured to the two outlets of the release bearing. This was important as the flexible hoses needed to be attached before the engine was fitted.

Next job is either to mate with the engine (if the 572 has arrived) or fit the propshaft.

Wednesday, December 16, 2015

Engine mountings fitted

Had a visitor today who brought gifts, well it is nearly Christmas. Steve Hughes arrived and we had a good chat and some scrummy cakes. Yum yum! Then he took some photos of my build so far. Hopefully they will not lead him astray.

The engine mounts

The adaptor plates supplied by GD were fixed to the engine block (remember it is a Chevy LS engine) with two long cap head bolts and one short countersunk set screw in the locations shown below. Nice bit of machining Mr Akerman. 
Adaptor plate in place on the nearside
The adaptor plates allow the GD supplied engine mounts to be fitted to the LS engine, after a little modification. The metal and rubber engine mounts had the "bump" at the rear ground off, so they sat flat on the adaptor plate, taking care not to get too much heat in to the mount. Here a bench grinder and a burr in the electric drill did the trick.
Engine mount as supplied
Modified engine mount
The engine mountings were trial fitted to the adaptor plates with one long (bottom) and two short cap head bolts and thread locked. The final fit is done whilst the engine assembly is fitted to the chassis.
Engine mount bolted to an adaptor plate. Remember this needs
removing prior to fitting in the chassis, to make it easier
Another shot of the nearside engine mount trial fitted
This was repeated on the other side.

Thursday, December 03, 2015

Cobra chassis here

Today I collected the rolling Euro chassis and various other parts related to the engine from GD. It was over a month later than I expected, partly due to supplier issues. However, I still had a few things to do on the body, so time was not wasted.

I have had AP brakes fitted, along with Pagid brake pads, as I wanted the thing to stop. I know it will go, with 480 bhp it should! My previous experience with Pagid Blue pads was brilliant. They are not cheap, but they worked from cold, on track and on the road. Worth the investment.
Chassis being strapped on to trailer at GD
Chassis on trailer outside GD
I collected the radiator, headers (manifolds to us English), the exhaust, the air intake, various fuel system parts, engine mounts, hoses, steering shaft, drive belt etc. So a big bill (it also included the wheels and carpets).

Some other cars/shells that were at the works today. The red one in particular looked awesome. Black base, maroon red, with a glitter lacquer on top and silver stripes. Yummy!

Wednesday, December 02, 2015

Cobra carpets arrived

The carpets arrived today. Wasn't expecting them until the end of the month, but got a call from Meena at GD yesterday to check that I would be in to receive them!

The car is white, so I have decided that I will use black and red to create a contrast. The carpets take on this theme too. Horizontal surfaces such as the floor and transmission tunnel top will be in black, whilst the vertical surfaces such as the sides of the transmission tunnel and sides of the cockpit, will be in a rich red. The boot will be in black.

The carpet colours are black CPBW7401 and rich red CPBW7404 from the Boyriven range. Because I had chosen two colours, there was a premium of £120 to pay, but I think it will be worth it.

So here are the carpet parts laid out, as received from the trimmers. I need to work out where each piece fits, although some are obvious.
Carpet set. Need to work out where all the bits go!


Tuesday, December 01, 2015

Clutch fitted to engine

Today I had to clear out the garage so that I could get in and to prepare a space for the Cobra chassis! I have a nasty habit of putting things down anywhere there is space. Not usually in the right place either. Then I try to find the tool or item again and spend an age looking for the thing. Anyway, the garage is fairly tidy now - at least for a day or two.

Engine anciliaries

The new starter motor and belt tensioner were fitted to the engine. Thread lock was applied to the bolts and they were torqued up to 37 ft lb (remember that the block is aluminium, so you don't want to strip the threads!)
New starter motor in place
New belt tensioner fitted
Flywheel fitting

I fitted the spigot bearing in the end of the crank shaft.
Spigot bearing fitted to centre of crank
Making sure that there was a small radius on the bolt holes on the flywheel, it was attached to the crank on the back of the engine hand tight with six new high tensile bolts (I used ARP bolts from Roadcraft). The bolt pack says  'DO NOT use any washers' here, so I didn't! The thread of the bolts were thread locked and under the bolt heads ARP Ultra-Torque lubricant was applied (this stops false readings when torquing bolts). The lubricant is supplied with the bolt pack.

The bolts holes on the flywheel were marked 1 to 6.
Bolts marked with sequence numbers
The bolts were tightened in the following sequence 1, 4, 2, 5, 3, 6. Thread lock was applied to the bolts before they were torqued. They were tightened in three passes as follows:
  • 1st tighten to 25 ft lb torque
  • 2nd tighten to 50 ft lb torque
  • 3rd tighten to 85 ft lb torque
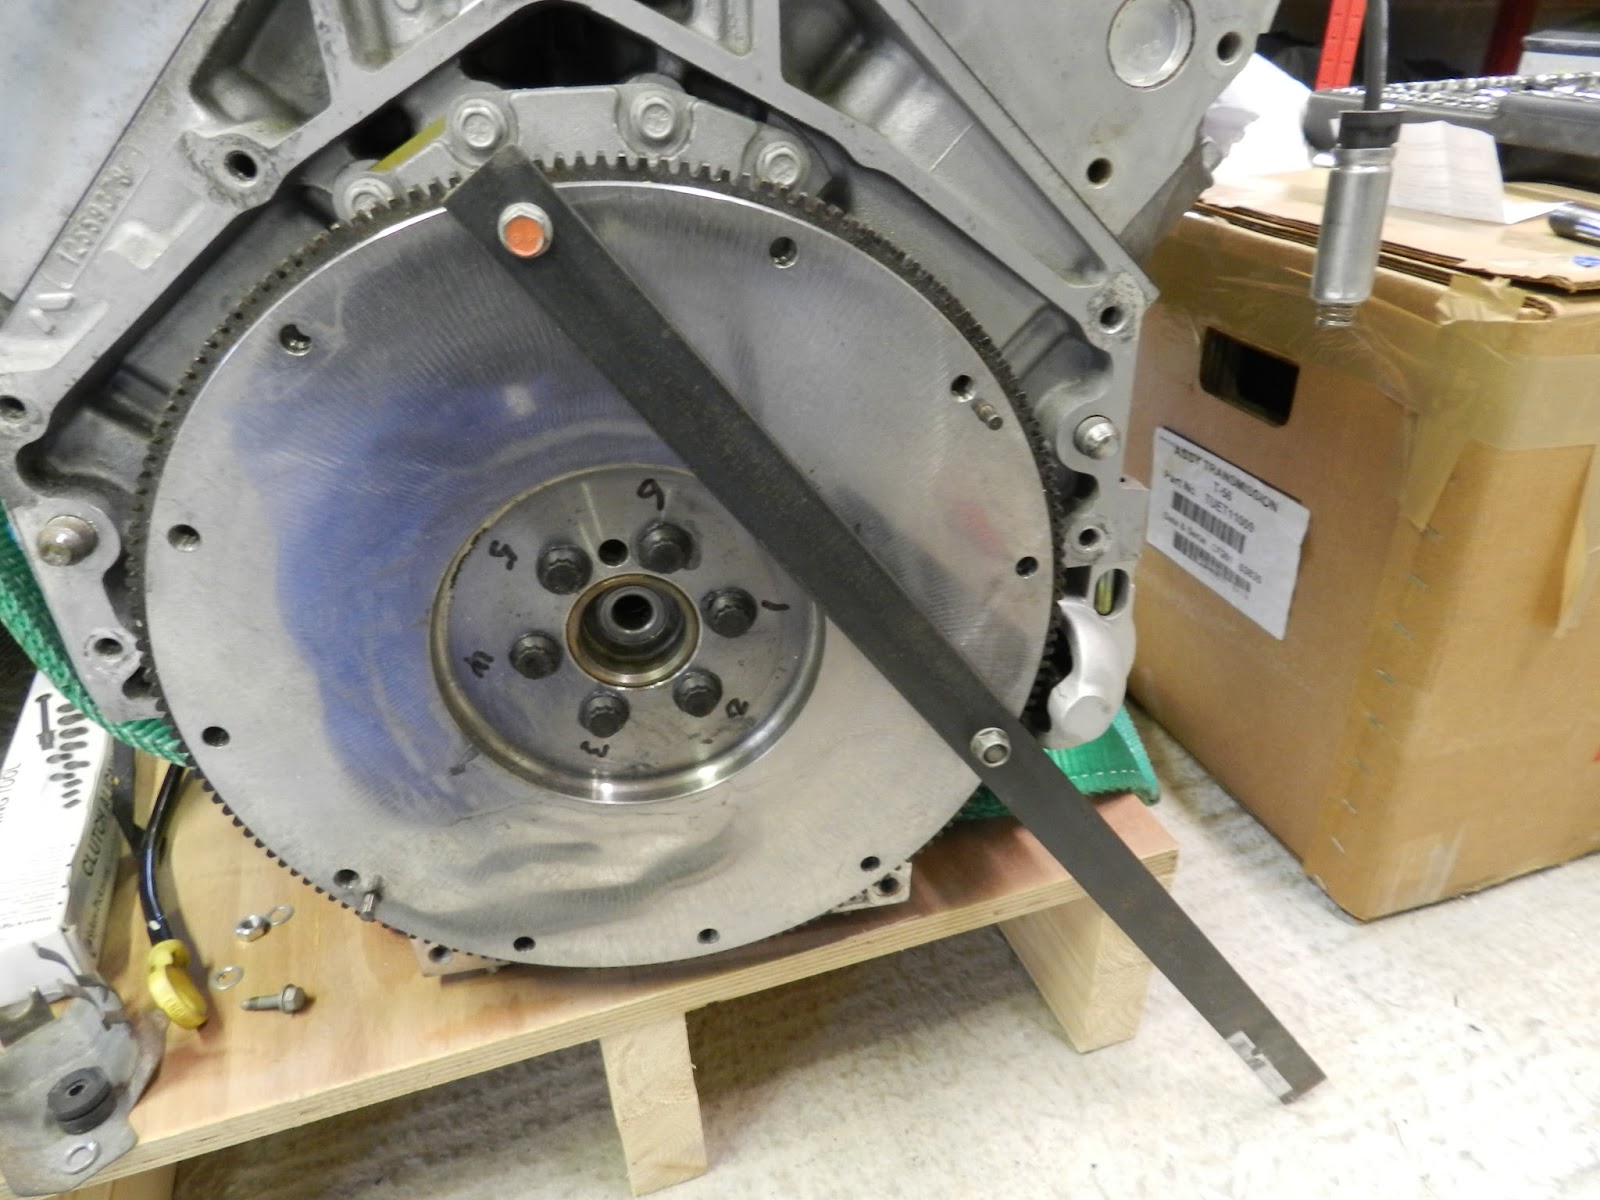
For the last pass, the flywheel needed to be 'locked', so a steel bar with two holes was used. This was bolted to the flywheel. The bar stopped the flywheel turning by making contact with a solid object (in this case the ground).
Bar made to enable flywheel to be adequately torqued
Finally any excess lubricant was removed from the bolt heads and the flywheel was given a clean.

Clutch fitting

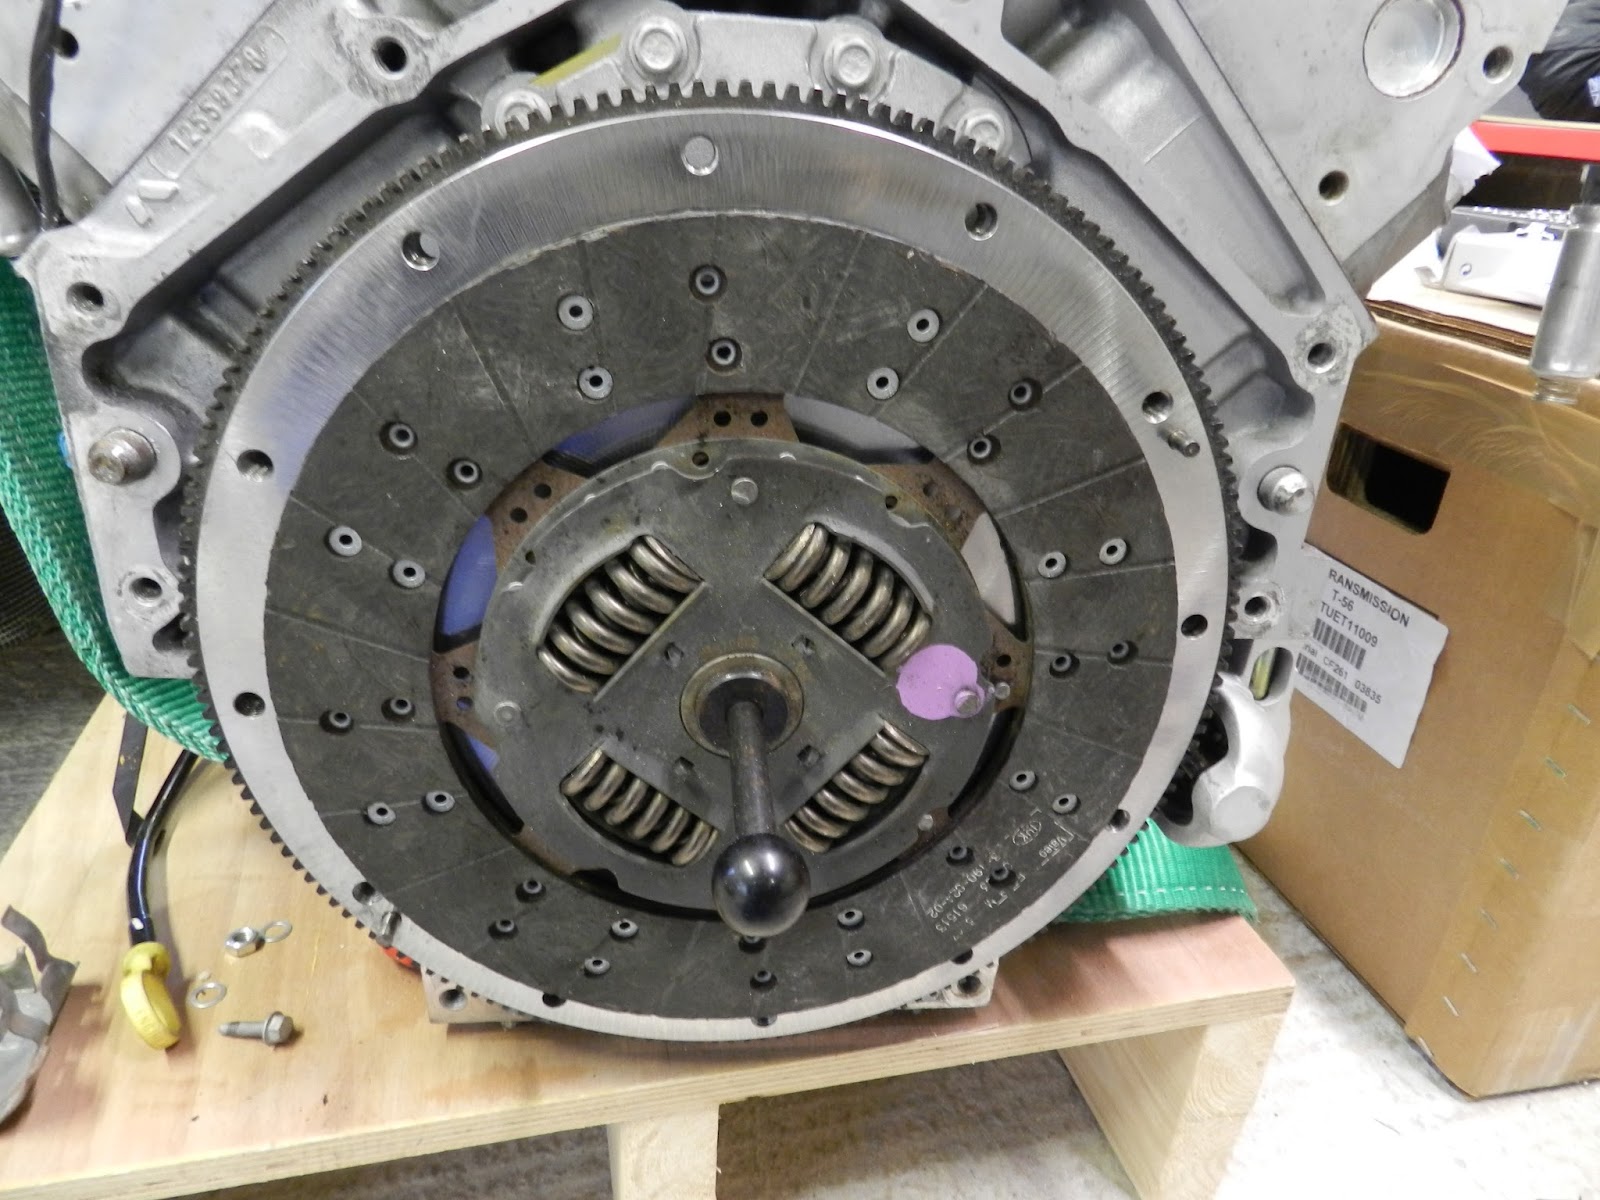
When the flywheel was fitted, the clutch plate was put on the flywheel (the clutch plate was pre-marked with the orientation on one face and it can really only go one way) and was held in place with the clutch alignment tool.
Clutch plate over clutch alignment tool
Thread lock was carefully applied to the threaded holes of the flywheel and the ARP Ultra-Torque lubricant was applied under the bolt heads. The clutch cover was put over the alignment tool on to the locating pegs.
Clutch pressure plate in place and ready to torque
Again the six bolts were tightened in three passes in the following sequence 1, 4, 2, 5, 3, 6. The torque for the three passes were as follows:
  • 1st tighten to 20 ft lb
  • 2nd tighten to 40 ft lb
  • 3rd tighten to 52 ft lb
As the torque for the final pass was fairly low, it was not necessary to 'lock' the flywheel. Instead Keith Akerman recommended (thanks Keith) that I tighten the bolts at the nine o'clock position. This stops the flywheel turning.

After the final pass, excess lubricant was removed from the bolt heads.

Thursday, November 26, 2015

Windscreen, washer jet and stay

Initially I applied masking tape to the scuttle and marked the centre lines for the washer jet and wiper spindles. The spindle centres were marked at 415 mm from the outside of the stanchions. With the washer jets I had decided, like most, to only fit one double jet even though two were in the kit. This was marked up on the centre of the car.
Spindle and washer jet centres marked
Washer jet

The centre of the washer jet hole was marked 45 mm from the screen rubber and 20 mm back from the bonnet recess on to some masking tape. An 8 mm hole was drilled through the scuttle. The jet was fed through the hole and the supplied nut was used to secure it from underneath. The angle of the jets will need adjusting once power can be applied to the pump.
Washer jet fitted
The clear plastic water tube was then cut and fixed to the jet and to the washer bottle pump. This was simply pushed over the tails (you may need to warm the end to do this).

Windscreen centre stay

This should have been an easy job, but like many this didn't turn out to be the case! The stay consisted of three parts plus two screws. The stay was put to one side. The lower part of the bracket was bent a little more to reflect the angle of the screen. The two brackets were made up in to one bracket and fitted to the bottom of the screen in to the two pre-tapped holes using the screws supplied (at this stage the screen was off the car). The screen was then offered up to the body.
Two brackets made in to one and attached to screen
With the screen in place, it was clear that the bracket was about 3 mm above the scuttle. Problem! A quick call to Andy helped solve the issue.

Each screen is handmade and this means that the tolerance is quite wide. The answer was to elongate the stanchion holes and drop the windscreen to close the gap and put a little more compression on the rubber strip.

So screen off again. Stanchion legs and cross braces removed. The fixing holes were then elongated to allow the screen to drop a few millimeters.
Stanchion hole elongated a little
After a few attempts, the holes were opened out the right amount. I needed patience here and so did Carol, who was roped in to help put the screen on and take it off .... quite a few times. The stanchions and cross braces were loosely fitted to the car. Then the windscreen fitted and measurements checked again. Now the stay bracket fitted flat to the scuttle. Phew!
Stay bracket in place
The screen screws and bolts were tightened up to stop the screen moving and measurements taken. After a little bit of adjustment, the measurements were spot on.

The next step was to fix the windscreen stay. In theory a simple job, but due to the size and angle of the bracket it took an age. To tighten the button heads, I had to grind down an Allen key a little. I expected this to be the worse part, but no. The bracket was fixed to the scuttle using nyloc nuts and washers. Next the stay was fitted. This involved hooking one end over the top of the screen and the tightening two nuts at the bottom around the bracket. What a job! I definitely needed patience here.
Screen stay in place
So now it is done. Just need to remember to apply silicone around the stanchion legs and escutcheons, to keep the water out.

Thursday, November 19, 2015

Engine and clutch parts arrived

Engine and clutch parts

It is 18 weeks since I collected the engine from Kyle at Tim Adams Racing Engines. It was 15 weeks since I returned the flywheel, clutch plate, clutch cover and alternator as they were not as agreed. After emails and phone calls, the replacement clutch and other parts have now arrived. The flywheel and clutch plate are good. The new belt tensioner, which was not on the engine when collected, has also arrived. However, the alternator is damaged and not as expected and I still do not have the dyno video.
Flywheel, clutch and alternator
I was expecting a used alternator, but got one with a broken plastic casing (the second one). I have now been offered to refund the cost of the alternator, but won't hold my breath. So I now need to source a new one. More money :(

The ECU, engine loom, immobiliser and the lambda sensors from Canems were as expected and their subsequent service has been second to none.

I can now get the flywheel, clutch plate and cover installed on the engine. The engine assembly can then be mated to the gearbox (once I have a modified clutch release mechanism from GD) via the bellhousing before fitting to the chassis. Also I have just received a new "hi-torque" starter motor from Roadcraft to replace the used one I had broken a contact on!
Shiny new starter motor
Bonnet gas struts

The other gas strut is now fitted. So that's another job completed, except for the locking mechanism!

Edit: I have changed the ball stud and this is better. It positions the strut more upright, however the locking mechanism is still too big to use. 
Second gas ram now fitted
A note of caution here on the bonnet. If you have the body on the frame and an electric garage door opener where the motor moves along the track - watch that the motor clears the bonnet when it is open. Mine didn't, so a bit more gel coating to do on the edge .....