Today I had to clear out the garage so that I could get in and to prepare a space for the Cobra chassis! I have a nasty habit of putting things down anywhere there is space. Not usually in the right place either. Then I try to find the tool or item again and spend an age looking for the thing. Anyway, the garage is fairly tidy now - at least for a day or two.
Engine anciliaries
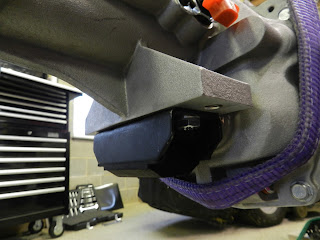
The new starter motor and belt tensioner were fitted to the engine. Thread lock was applied to the bolts and they were torqued up to 37 ft lb (remember that the block is aluminium, so you don't want to strip the threads!)
 |
| New starter motor in place |
 |
| New belt tensioner fitted |
Flywheel fitting
I fitted the spigot bearing in the end of the crank shaft.
 |
| Spigot bearing fitted to centre of crank |
Making sure that there was a small radius on the bolt holes on the flywheel, it was attached to the crank on the back of the engine hand tight with six new high tensile bolts (I used ARP bolts from Roadcraft). The bolt pack says 'DO NOT use any washers' here, so I didn't! The thread of the bolts were thread locked and under the bolt heads ARP Ultra-Torque lubricant was applied (this stops false readings when torquing bolts). The lubricant is supplied with the bolt pack.
The bolts holes on the flywheel were marked 1 to 6.
 |
| Bolts marked with sequence numbers |
The bolts were tightened in the following sequence 1, 4, 2, 5, 3, 6. Thread lock was applied to the bolts before they were torqued. They were tightened in three passes as follows:
- 1st tighten to 25 ft lb torque
- 2nd tighten to 50 ft lb torque
- 3rd tighten to 85 ft lb torque
For the last pass, the flywheel needed to be 'locked', so a steel bar with two holes was used. This was bolted to the flywheel. The bar stopped the flywheel turning by making contact with a solid object (in this case the ground).
 |
| Bar made to enable flywheel to be adequately torqued |
Finally any excess lubricant was removed from the bolt heads and the flywheel was given a clean.
Clutch fitting
When the flywheel was fitted, the clutch plate was put on the flywheel (the clutch plate was pre-marked with the orientation on one face and it can really only go one way) and was held in place with the clutch alignment tool.
 |
| Clutch plate over clutch alignment tool |
Thread lock was carefully applied to the threaded holes of the flywheel and the ARP Ultra-Torque lubricant was applied under the bolt heads. The clutch cover was put over the alignment tool on to the locating pegs.
 |
| Clutch pressure plate in place and ready to torque |
Again the six bolts were tightened in three passes in the following sequence 1, 4, 2, 5, 3, 6. The torque for the three passes were as follows:
- 1st tighten to 20 ft lb
- 2nd tighten to 40 ft lb
- 3rd tighten to 52 ft lb
As the torque for the final pass was fairly low, it was not necessary to 'lock' the flywheel. Instead Keith Akerman recommended (thanks Keith) that I tighten the bolts at the nine o'clock position. This stops the flywheel turning.
After the final pass, excess lubricant was removed from the bolt heads.


