Thursday, April 01, 2021

Car gone today 😢

Five years since my adventure of building a GD started and three years since it was finished, this car has now been sold and was shipped to its new owner in Nottinghamshire today. The car was transported in a closed PRG trailer by Andrew at Zoom of Chester. Great service if you ever need your car moving and you don’t want to drive it.

The car can be seen later this year at the Newark car show in July 2021 and no doubt in the lanes around Nottingham. It maybe even have its new roof, air scoop and a few other modifications. 

Monday, September 28, 2020

130,000 plus page views

The counter has passed 130,000 page views for this blog. Thank you for visiting.

Not surprisingly the most viewings are from the UK, followed by Russia (!), USA, the UAE and Germany.

Saturday, September 26, 2020

Cobra bound for a new home!

I have taken a deposit on this great car. Will be sorry to see it go, but things move on in life. 

Hope Steve enjoys it as much as I have and that it will have a good home.

AK with lick of paint

The previous blog showed us putting the body on Terry’s car. Just look at it now - what a stunner! 

Edit April 2021 - this car is now featured in the latest Complete Kit Car magazine, including on the front cover.


Saturday, February 22, 2020

Clothing an AK

Went over to Terry’s in Pateley Bridge to help lift the body onto his AK chassis. James was driving (almost finished his AK), but a boat would have been better after the heavy rain - floods around Otley.

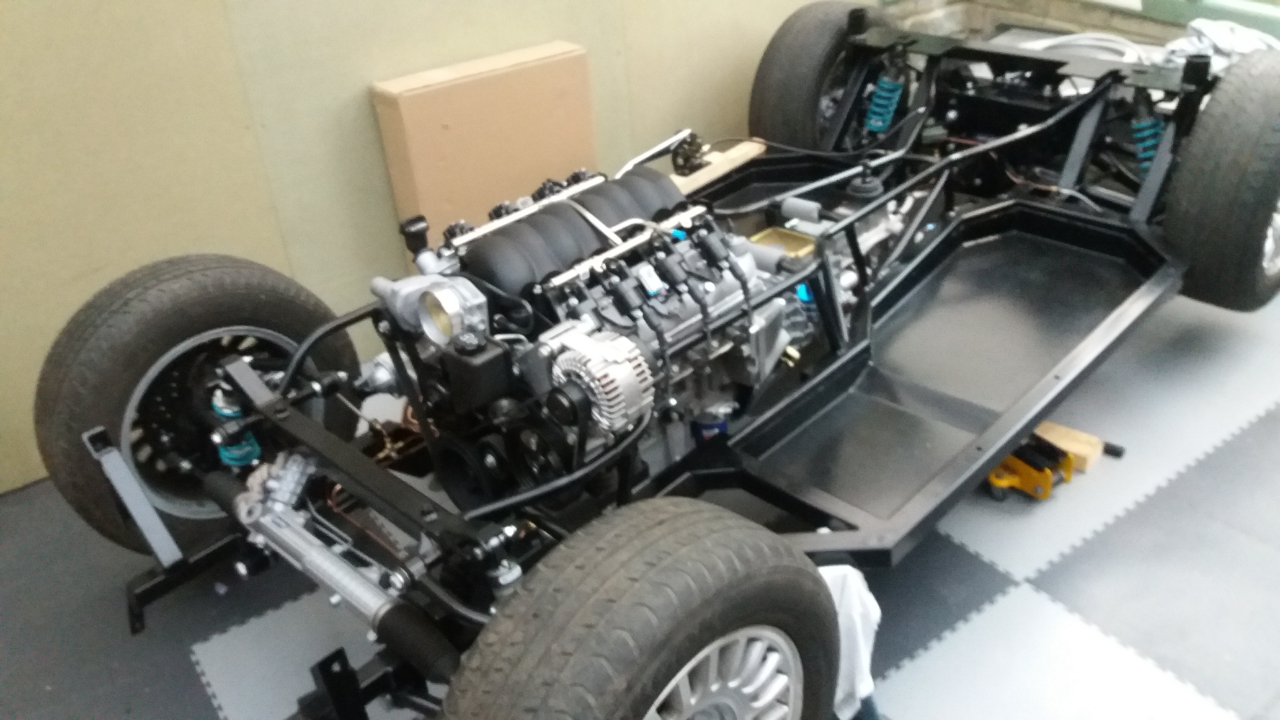
Anyway, with help from Stan we managed to get the body on, although it was touching the near side manifold when in place. So another phone call to Jon at AK and a further challenge on the build route for Terry!
Stan, James and Terry ponder. What’s that then?
The body over the chassis, ready to fit

Saturday, January 25, 2020

Side screens

The wind wings were left off and the mirrors were removed from the windscreen. The wind wing hinges were refitted to the windscreen.
Side screen with guide to cutting
5mm Perspex sheet was used for the side screens. This had guidelines drawn on it by GD - note that it says ‘guide only’. The cutting will depend on how you
have installed the hood, so the cut line WILL be different from the lines GD have drawn, unless you are very lucky.

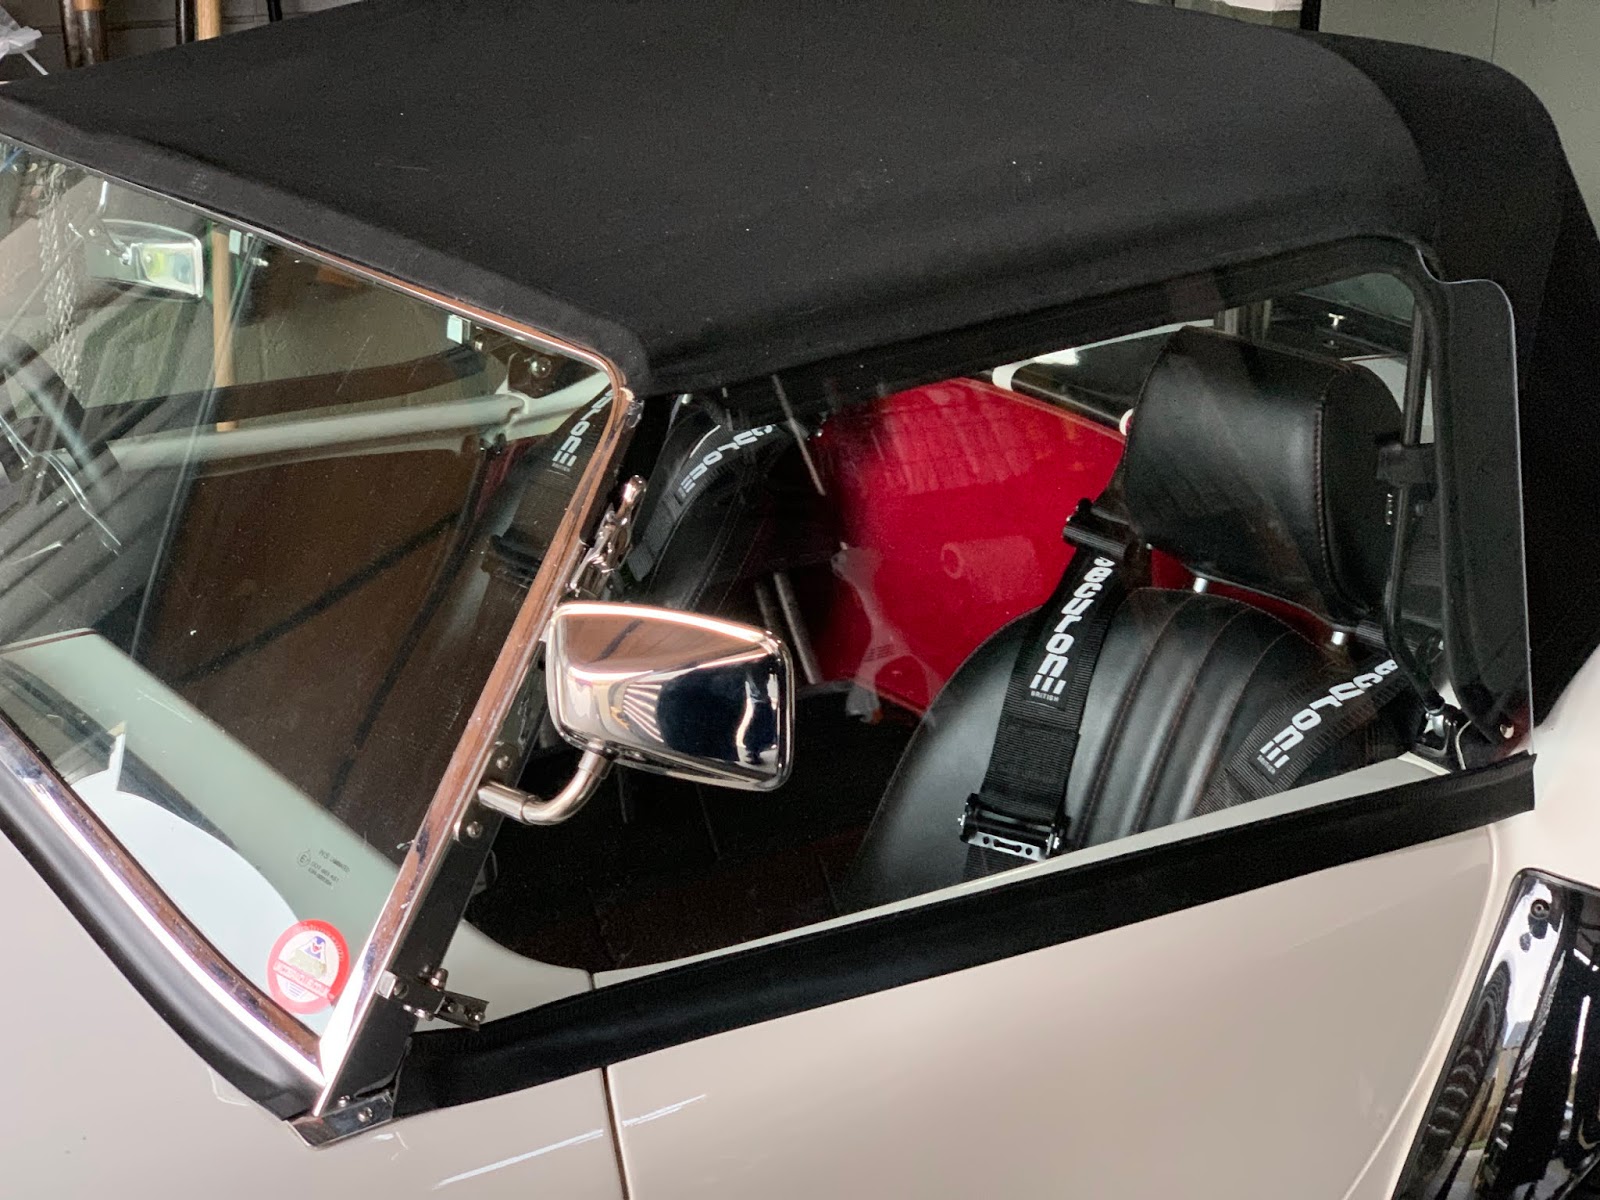
The Perspex was cut, using a slow speed on the jig saw, replicating the screen rake angle, but allowing an extra 3mm clearance for the hood bow. The front edge of the side screen almost touched the windscreen frame. The bottom edge of the side screen was set about 13mm from the door top, to allow for the rubber seal - I used a piece of wood taped to the door to space the side screen from the door. The bottom rear part of the side screen was also cut to create a 13mm gap to the door at this stage. The side screen was temporally taped in place.

Side screen temporarily fixed with tape and hinge. Note the tape on the doors holding the wooden spacer
Holes were then drilled to mount the side screen to the hinges and these were temporarily secured in place to make sure that the cut was right. No seal was required between the side screen and windscreen.
Side screen hinge
Next the top stitching was used to help mark the top of the side screen, so that it could be tucked under the lip of the hood when closed. The factory markings on the Perspex were incorrect for my screen. So after numerous measurements and remarking, the cut was made. This was a time consuming job. An “S” transition was used at the top rear to create an overlap of roughly 70mm to the rear (screen to hood) to allow rain etc to be blown off to the rear.
The correct cut line is the thinner line near the top, so DO NOT cut to the line drawn. As it says it is a guide only.
The Perspex was removed and cut to shape. The side screen is flat, so does not follow the shape of the car - it sticks out a little at the bottom rear, but being Perspex there is some flexibility here. So it will need fixing at the rear to pull it into shape. This will also stop the side screens lifting when the hood is in place or when the screens are used without the hood.

GD recommend a turn catch that bolts through the side screen and turns behind the elbow of the hood frame, but this limits the side screen use to times when the hood is up! The bottom of the screen cannot be fixed to the door top, otherwise the door will not open (due to the windscreen angle). So I have yet to decide how to fix them - possibly a turn lock that goes behind to door top or some Velcro that goes from the side screen to the top underside of the doors.

The edges of the Perspex were sanded smooth, then polished with a fine body compound, before the rubber seal was worked into place on the bottom edge. Here I applied a little Vaseline to the rubber seal and then worked it into place. Patience and some strength is required here! Finally, clear anti-scratch film was applied both sides (inside and out), at the top of the side screen (tucked in edge only), to prevent scuffing when used. The screen was then refitted to the car.
Here you can see the bottom rear sticking out, until a catch is fitted
Side view
View from front

This process was then repeated on the other side of the car.

I decided to use ‘glove box’ locks for the side locks. A hole was cut in each side screen to the ‘across flats’ size of the lock barrel, then filed to a square to take the locking mechanism. This stops the lock turning in the sidescreen.

The side screen catches were next. First I removed the existing catch part and made up a longer catch from aluminium bar. This was cut so that 50mm was extending towards the door top and 65mm to the other side (115mm in total). Shrink wrap was applied to the longer side to act as the handle. A square hole was cut as the pivot 50mm from the short end, before attaching to the lock (see below).
Catch made to fit lock.
Next the catch position was marked onto some masking tape on the top of each door. The slot size was marked from the escutcheon (I used the bulkhead escutcheons from GD) onto the tape and the screw positions marked. A slot was then cut with the Dremel. After filing out the slot a little, the masking tape was removed and the escutcheons fitted in place using two screws.
‘Bulkhead’ escutcheon one door top
Finally the side screens were re-attached and the catch positions checked.
Screen in place with catch

Monday, December 16, 2019

Hood (part 5)

The centre of the Tenax fastener holes were marked on the fabric where it fitted to the moulding. This was just above the dip between the boot and the rear wing on each side.

The hood fabric was carefully removed from the car. To finish off the hood, the fabric over lapping the hood bows was stuck in to the channel and surplus fabric trimmed off.
Fabric stuck into channel and clamped in place
Fabric trimmed so that it is only stuck to the front face of the channel
Holes were punched in the corners of hood fabric, where marked. Next I made up two tabs out of plastic, using a photo from Andy as a guide.  The screw thread of the spring cap parts of the Tenax fasteners were pushed through the tab and then the fabric. I tried to screw on the “nut” part with a Tenax fastener tool. Although the plastic was supplied by GD, I could not get the plastic and hood fabric between the two parts of the fastener as they were too thick, so this part was abandoned! The idea of the tab is to stop the piping curling up at the corners, so I will have to live with this risk. The Tenax fasteners were therefore fitted without the tabs.

The stud was fitted to the moulding. The nut that goes onto the stud behind the moulding was fiddly to attach to say the least!
Tenax fastener fitted. I have now removed the crease by tensioning the material.
The hood was refitted to the car. It was then that I noticed that the locating peg from the front off side screen bows had pulled out of the bow. So another job to refit it. (Note: Decided to buy a new bow from Europa rather than seek out a welder to fix it).

Inside view
View from front
View from rear
Job finally done - after three attempts at getting the tension right to get rid of the ridges in the fabric - had to pull the stuck fabric off the bow, remove the adhesive and then refit!

I was told that the first time the hood gets wet DO NOT put it down until it is dry, otherwise you will never get it back on. So I won’t risk it, but presumably it will help further tension the hood by getting it wet.

Now for the side screens!

Saturday, December 07, 2019

Hood (part 4)

The hood fabric was removed again and warmed up in the house, then refitted to the moulding and over the hood frame (this is important to ensure that the tension is correct). Make sure that the hood frame is fitted the right way round  - with the cranked bits facing forward. The frame straps were put in place to hold the metal tubes in the correct place. A small heater was placed on the transmission tunnel to keep the hood fabric warm and pliable.

The fabric was pulled over the hood bows and screen, then taped in place, making sure that the overlap at each side was as near as possible same. The rear fitting to the moulding had to be adjusted to remove the sag from the rear window and creases from the roof area. The whole thing took a lot of fiddling, a bit of cursing and I broke a few finger nails in the process!
Effective, but doesn’t look pretty!
Inside looks ok though.  Note: straps to retain spacing of hood frame
Next the hood fabric was released from half of the screen and adhesive applied to the front of the hood bow only. The fabric was pulled over the bow/screen into its original position and the tape was then re-applied to retain the position whilst the glue set. This was then repeated for the other half. Note: The fabric is only glued to the face of the hood bow (not the top, as this slopes in the opposite direction to the hood fabric).

The press studs were fixed to the moulding (see photo) to secure the hood flap. I used double sided number plate adhesive tape to help identify where the male studs should be fixed. Simply put a small piece of number plate tape or similar under the female part of the press stud and apply some pressure against it (the female part of the stud is already fixed to the hood). Then drill a hole in the centre of this mark. I used a small nut, bolt and washer to fix the male part of the stud.
Press stud fitting to moulding
I made sure the securing tape (to the screen) was plentiful and left the hood on the car overnight for the adhesive to go off.

Thursday, December 05, 2019

Hood (part 3)

The hood has come back from the trimmers. There was a roll of Velcro in the pack which wasn’t there before. On closer inspection I noticed that the Velcro was just the hook part (there was no loop Velcro). Also I noticed that the hood fabric that went under the moulding, has been cut off! So a quick call was made to Andy at GD to find out what this was about.

Andy said that the fixing method had changed. He recommended that I applied adhesive to the moulding and let it go off. Then to stick the hook part of the Velcro to the moulding. The loop part of the Velcro is already sewn on to the hood fabric. Andy also sent through some photos of a hood fitted to a factory built car. These showed that in addition to the Velcro, two Tennex fasteners were used at the rear corners of the mouldings to help hold the hood in place. Andy sent through a couple of Tenax fasteners. Another photo showed where the other part of the hood press studs were fitted.

First the mouldings were removed from the car and the position of the Velcro was marked on the upstand of the mouldings and cut to length. The Velcro was positioned so that the very bottom edge of it was in line with the moulding’s lower edge. This makes sure that the piping on the hood fabric is a snug fit to the body. This area was rubbed down again to provide a key for the adhesive and masked off. The exposed part of the moulding upstands were spray painted to tidy them up a little (Andy also trims the ends of these with some leather). Once the paint was dry, the masking tape was removed and the adhesive was applied to the mouldings. When this had gone off, the hook side of the Velcro was applied to each of the mouldings and the moulding re-fitted to the car.

Next I applied some P shaped draught excluder to the underside of the two mouldings. This was to seal any gap and to stop the moulding scratching the car body (not in the GD instructions).

The hood fabric was warmed up on a radiator to make it more flexible to fit.

A bit of heat helps with the fabric fitting.
The centre of the hood fabric was found (mine had a central seam) and this was positioned to align with the centre of the car. The hood fabric was then attached to the car using the Velcro, stretching it to go around the moulding.

Fabric fixed to GRP with Velcro 
The inner flap near the doors do not reach the ends of the GRP - about 30mm short (so 20mm better than it was!). Andy says this is OK and this is why he finishes it off with some leather. So the fabric does not cover all of the GRP (see photos).

Near side flap is short of GRP end 
As above, but for the off-side
Next job, once I have thawed out, is to fix the hood fabric, press studs and the Tenaxfasteners. More on that later.

Friday, November 01, 2019

Update

Sorry I haven’t posted recently regarding the hood. This is because I could not stretch the fabric around the moulding no matter how much I tried or heated it. As a result and following a conversation with Andy at GD, the hood fabric has been sent back to the trimmers to ease the stitching holding the piping in place. This appeared to be stopping the fabric from stretching around the moulding and so it was about 50mm (2 inches) short at each side!

Saturday, October 26, 2019

Engine in AK

Got an email from Terry, who is building an AK, asking if I would help install his engine. So a quick trip over to Pateley Bridge in the pouring rain.

His workshop is so tidy, made mine look positively bomb like!

So after a bit of prep, he shifted the engine hoist round to the front of the chassis.

Me stood with hands in pocket. Easy life!
After a few huffs and puffs and a few hours of pushing, pulling and lowering, the engine went in to place. Brilliant stuff!
Engine in place, just to tighten up mountings.
Terry thanked me for my help, but I seemed to be the king of standing around (see first photo for proof!).
Engine in place without the hoist.

Wednesday, October 02, 2019

Hood (part 2)


OK so I have fitted the bows to the screen in part1. So now it is time to move to the back of the car.

The GRP skirt moulding was in two parts (not one as stated in the instructions).

Mouldings may be one part or cut in two as mine was
 I applied plenty of masking tape where the moulding would fit to avoid any scratching of the body.

Masking tape applied to the body
Next I drilled 8 pilot holes where indicated on the mouldings. I sanded the mouldings to remove any sharp edges and the hole marking 'pimples'.  Then the mouldings were lined up on the rear deck, so that the overhangs were tight up against each door reveal and the centre rear trailing edge was 60-65mm from the boot shut line. The mouldings were taped in place. Once in place, the pilot holes in the skirt moulding were used as a guide to drill through the body. These were then opened out to 8mm using a step drill bit. 

Mouldings held in place with masking tape prior to drilling
Holes drilled in body
The M8 thread inserts were fitted in to each hole in the body and secured from inside the boot and wheel arches with penny washers, shake proof washers and nuts.

Inserts fitted
The pilot holes in the mouldings were opened out to 6mm (allows clearance for the thumb screws). The mouldings were trial fitted using the thumb screws and the holes adjusted a little to fit. Once I knew they fitted, the skirt mouldings were removed and trimmed back 6mm from the door shut line and the rear was cut to the marks provided by GD (This is where you cut it in two if it is in one piece).

t was 
Rear of moulding cut to allow hood to fold
Then I fitted the two pivot brackets to the mouldings using the countersunk screws provided. The pin ends of the bracket face towards the inside of the car. The centre line of the bracket should be 30mm back from the door shut line and approx 30mm in from the cockpit roll edge. 

Pivot bracket in place
The hood frame was put together (it needed the inside of one of the frame legs reeming out a little) before fitting in place (note that the frame main legs are cranked so that the hood can lay back over the body).
Hood frame fitted
The next job is to start fitting the hood fabric.

Tuesday, October 01, 2019

Hood (part 1)

I removed the existing ‘wind wings’ from the screen stanchions to get them out of the way, keeping the hinges and fixings for later use on the side screens.

The two over-centre catch ‘keepers’ were fitted to each side of the screen (with the short countersunk screws supplied) using the two pre-tapped holes just above the top hole position of the wind wing hinge (don’t use longer screws or you may damage the screen). The keepers, and not the catches as stated in the instructions, fit to the screen stanchions.

Keeper fitted to stachion.
Make sure that the sun visor mountings are pointing down (I had put mine on facing up to gain height), if you want the bows to fit!

The sun visor bracket now points down (the correct way)
The two hood bows were trial fitted along the top of the screen, with the locating pegs towards the centre (they will only go on one way). The driver’s side bow was a very poor fit at the end, so needed quite a lot of time spent fettling and repainting to make it acceptable.

Bow side was poorly bent, so had to be reshaped for a better fit
Once this was done, the holes for the over-centre catches were then marked on to the ends of the bows, whilst the catches were in the closed position (not easy as the holes get covered by part of the catch!). The bows were removed and drilled with 2.3mm holes. The over-centre catch holes needed opening out a little to take the rivets. These were then fixed with the pop rivets supplied. The pop rivets were fixed from the outside of each bow. The backs protruded towards the screen surround, so were peened on the inside to reduce their height and any sharp edges removed.

Catch in place
Next I applied masking tape to the top of the glass and the front face of the chrome screen surround. This should help protect it from glue at a later stage. I marked the centre of the screen for later use too.

Screen taped and centre marked
On each bow I marked a line 4” (100 mm) from the bottom edge of the bow outside edge (the bit that goes down to the new keeper). The front face of each bow was then lightly sanded from the centre to the marked line. The un-sanded section will be seen when the hood is fitted, so this was not rubbed down. If you sand beyond this point, then you will need to re-paint this section of the bow.

Now for a cup of tea and a rest, before I tackle the next stage. Needed at my age!

Friday, September 27, 2019

Hood arrived

Hood bits arrived today.

Clockwise from top left: hood, ‘rough-cut’ side screens, hood bows,
GRP  sections for rear, hood frames, window seal, fixings.
These are the bits I bought. The side screens are described as rough-cut, but are straight Perspex with indicative instructions written on. The GRP pieces also have instructions written on them. Fitting instructions were sent separately by email. All looks straight forward .... famous last words.

Now it’s just to fit!

Thursday, September 19, 2019

Hood ordered

After many month’s of struggling to get weather gear. I have finally been able to place an order with GD for a hood. In total the full soft top kit is a staggering £1,700, plus delivery, no doubt plus glues and some other tools as well. I had expected more like £1,000! The reason I have decided to buy it is to make the car more usable, since I have only done around 2,500 miles in two and a half years!

The hood is a fold down type, so it can stay on the car when not up.

The kit comprises:
  • Black fabric hood
  • Hood frame
  • Rod ends and linkages
  • Over centre catches
  • Bows to attach to screen
  • GRP surround
  • Fixings etc
Included in the price above are Perspex side screens, rubber seals, catches and hinges. I have only ordered the side screens and rubber seals at this point, in addition to the hood kit. The hinges will come from the wind wings and I will decide what to do about the catches once I can assess what is needed to secure the screens when used with the hood down.

The side screens are essential, if you are to ride without significant buffeting from the moving air and whining from the misses i.e. anything above 50 mph. The hood makes a few days away from home a possibility in the UK, without constantly looking at the weather forecast app. on your phone and hoping that it is going to be right. Apparently, it also helps to stop the wind attacking you from behind, even when it is down.

The hardtop would be more weather proof, but once on and driving you can’t take it off when the sun (that thing in the sky that you can occasionally see in the UK) comes out.

An optional hood bag is available at £330 - gulp - which I won’t be getting!

Monday, September 16, 2019

Thinking about weather protection - again

I have been looking at weather protection for the Cobra again, after having my ear bent by Andy Holmes (the guy I helped to put his Cobra body on - see separate post). This was the main reason for taking the tin top over to him in Lincolnshire a couple of weeks ago, much to his dismay!

The lack of a hood or hard top has also played its part in keeping the car’s mileage low. Both hardtops and hoods were not to be had when I was looking. In my opinion, this was because the hood and hardtop manufacturers couldn’t be bothered to get their fingers out.

Time has now passed, so I am looking at this again, so that the Cobra will become more usable. Watch this space!

Tuesday, September 03, 2019

Another GD gets clothed!

Went over to Andy Holmes at New Walton near Grimsby for a BBQ. Well to help put the body on his GD. Plenty of help - not sure how much was brought on by the offer of food from Annie. Annie is Andy’s long suffering wife! Steve was there, Andy’s right hand man on the build, or is Andy the helper in reality?

Anyway, after a bit of pushing and shoving the body was on. Looks good too.


(See the link to Andy H’s build on the right of this blog - scroll down a little).

Over 115k page views

Just gone over the 115k page views since I started this build. Most visitors have come from the States, closely followed by UK page views. Thanks to all those who have visited this site. I hope it continues to prove useful to you.

Finding things - made easier!

Hopefully I have improved the navigation of this blog a little, so that you can find things. I have added some labels (build elements) and have been through these to break them down a little. If you have any further suggestions, please let me know.

Wednesday, September 05, 2018

Over 90,000 page views!

Just topped 90k page views, with the US taking the top spot, followed by the UK. Thanks to all visitors to my blog!