Thursday, January 12, 2017

Small things

It has been snowing on and off today and is very cold in the garage, so time in there was kept to a minimum!

Speedometer

After using the wrong diff ratio the first time, I recalculated the speedo setting with the correct ratio at 27,868 for the ETB gauge. This will need putting in to the speedo prior to using the car.

Front dummy number plate

After spraying the dummy number plate satin black, I fitted it to the car using 19mm P-clips and button head bolts.
Dummy number plate can be seen here
Clutch reservoir

I noticed a fluid weep from the reservoir, so had to remove it and refit. Looks like it is cured.

Coolant

Following my abortive attempt at filling the cooling system, I had to drain the fluid because of a leak at the thermostat housing.
Leak under thermostat housing on right of photo
I rescued the fluid, so that I could re-use it! The thermostat housing leak was sealed with Hylomar sealant and then refitted to the engine and the hoses. Care was needed not to trap the thermostat between the housing and the outlet, otherwise it couldn't be sealed (as I found out!).
Reseated and sealed

Tuesday, January 10, 2017

Coolant, clutch, IVA, ECU etc

Coolant

The coolant system took around 16 ltrs, 70% water to 30% antifreeze. This was added to the stainless steel expansion tank at the front of the engine compartment.
Coolant header tank
It was poured in gradually to reduce the risk of air locks. All pipes were checked for leaks at this stage. There was a leak in the thermostat housing - mutter, mutter. As this had a rubber O-ring I had not used any sealant. I should have - another lesson! So that's a drain down tomorrow. Not difficult, but a job I could do without.

If you are doing yours, remember that I have a Chevy LS6 engine. The amounts may differ on other engine types.

Clutch fluid

The reservoir was filled with DOT4 fluid. An auto bleed system was used, so that I could do it on my own. Air pressure from one of the tyres was used.
Clutch reservoir. Bleed nipple is on right of two pipes - not easy to get at
Oh, and I noticed that a wire had broken to the knock sensor, so I had to repair this.

ECU

The ECU was fitted to the centre under dash tray using button head bolts in to rivnuts. I made sure that there would be clearance for the gauges and that the connector would fit the ECU in that position.
ECU bolted to centre tray
The remote button for the speedo was fitted to the central tray too. It is concealed, but can be operated from the driver's seat. There is a gap between the underside of the tray and the transmission tunnel top.

NOTE: Fit a PC flylead to the ECU to make access to the ECU easier. See IVA and Post IVA category in the Build Process.

Tachometer

The dip switches on the back were checked to make sure that the settings were correct. For the ETB tacho the first 3 switches are set to 1 (on) and the remainder are set to 0 (off) for the LSV8.

The speedo will need setting too, but for the first calculation I had used the 3.23 diff and the later chassis (including mine) have a 3.07 diff. So I need to re-check the setting with ETB.

The faulty switch for the rear fog light was replaced whilst I played with the dashboard.

Starter heat shield

I had left this off for some reason. So it was added. Needed to remove the dip stick first.

IVA items

A dummy number plate is needed for the IVA and was made from MDF, sprayed black and fixed to the bar at the front in the nose using two 19mm P-clips.

The rear number plate lamp had the bolt changed for a button head to comply with the 5mm radius rule.
Hexagonal bolt swapped for button head

Sunday, January 08, 2017

Dashboard and electrical - testing

I put the ignition barrel back in. Click the U clip down using a thin screw driver.
Push this clip DOWN until it clicks
If the key is in the same position as it was when it came out it should click back in place. If it does not go in it could either be that the U shaped clip has not been pushed down fully or the key has moved a little in the barrel. The first issue needs the U clip pushing down until it clicks (Tip: use your phone camera to see this). If the clip is fully down then it could be that the key has moved. The key can be moved carefully anti clockwise (when viewed from the back) to the stop or clockwise, but whatever you do don't let the pin go as far as the hole at the end (look at the side opposite the key to see this)! The barrel should go fully home and click in to place.

At this stage the fuel pump was not connected to avoid any risk of starting up the engine by mistake. Not all the electrics can be tested yet e.g. engine related items cannot.

The results of the first test were:

Working okay

Heater blower - off, speed 1, speed 2

Hazard warning lights - all four indicators flash (should lights on wings flash too?)

Hazard warning dash light

Indicator warning lights - when hazards flash

Brake lights

Horn - initially sucked instead of blowing and produced a weasy noise. Swapped the wires around and oh boy what a noise!

Wipers - parking correct way, intermittent, speed 1, speed 2

Washers - water jet plus single wipe and park. Adjusted the aim of the jets

Rear reversing light - ignition key needs to be in fully turned position and reverse gear selected

Rear fog light - main lights need to be on - faulty switch, so this needs replacing (worked if jiggled), also I had connected the red/yellow wire by mistake (this is the reversing light wire)

Fog warning light on dash - but see above

Lights - side lights, dip, main beam

Number plate light - on with lights

Auxiliary output - on with ignition switch

Instruments (just the back lighting) - oil pressure, water temp, speedometer

Battery light - no alternator working

Brake fluid low warning - no fluid in reservoir

Not working

Instruments (just the back lighting) - fuel, voltmeter, tachometer

Lights - flash and door courtesy lights

Indicators - front, rear, side repeaters - off side front and rear work when the ignition is on, no matter what position the indicator stalk is in!

Checked the connections to the left column switch (indicators) and they are correct. Traced the wiring for the indicators in the loom and that looks okay too. The wiring to the instruments looks correct as well. So I am flummoxed.

Mark Turnbull suggested that I test the switch as this seems to be a likely cause. If this doesn't work, then it is time to call in the experts!

NOTE: The earth connections to the instruments etc have been the main problem, so pay particular attention to these.

Saturday, January 07, 2017

IVA application

Spent the afternoon completing the IVA (Individual Vehicle Approval) documents - amateur build declaration, application form, copy of major item invoices (chassis, body, engine, gearbox, instruments, tyres) and photos proving that I built it!

Submitted it on-line, attaching the forms and proofs.

So I am committed now to get it ready for the test by Valentine's Day. Fingers etc. crossed.

The car will go to GD for a once over, before being presented for the test in Nottingham. Paul Bowden will collect the car and transport to and from GD - saves me hiring a trailer, petrol and wear 'n tear.

Friday, January 06, 2017

Electrical connections

Loom changes

Horn

These should ideally have been made before the loom was put in to the body, as it would have been much easier. On the column wiper and horn switch, there are a couple of changes to make.

First the horn relay (the third in) needs the purple loop removing.


Loop to remove can be seen here if you look carefully!
Loop removed

Earth added (see arrow)
Washer

The washer needs the green (or light green in my case) removing and replacing with an earth.
Earth wire (black) replaced green wire
Intermittent wiper

Then its the intermittent wiper. This needs more wires changing and a relay adding (VW 3BO955531 or 357955531). This has been ordered. It was easy enough to wire, although I did not have the correct colour wires, so used the correct gauge wire that I had and marked it up with the correct colour and the relay terminal. Refer to the GD diagram for wiring.
Changes made to wiring on column switch
Other connections

Now the bits that I hadn't done earlier!

The brake fluid warning wires on the loom had not been fed through the bulkhead or connected, so that was done.
brake fluid warning wires finally connected
Then it was pushing the fuel pump wire through the grommet at the top of the passenger foot well. Some Vaseline helped here. A new terminal has been ordered.

So hopefully that is the end of the wiring, assuming it all works! Now it is down to testing all the electrics.

Passenger seat

This was really easy compared to the driver's side. Basically I used the same process as on the drivers side, but did not have to worry about the handbrake. The seat belts were also added. Another job done.

Wednesday, January 04, 2017

Foot well carpet and bits

Number plate lamp

Sorted the number plate light today. The bolt was not holding the chrome trim properly. I drilled out the supposedly threaded hole and fixed a rivnut. This sorted it out.
Rear number plate light fitting with rivnut

Fog light wiring

For some reason I had not connected the three wires to the loom. Straight forward.

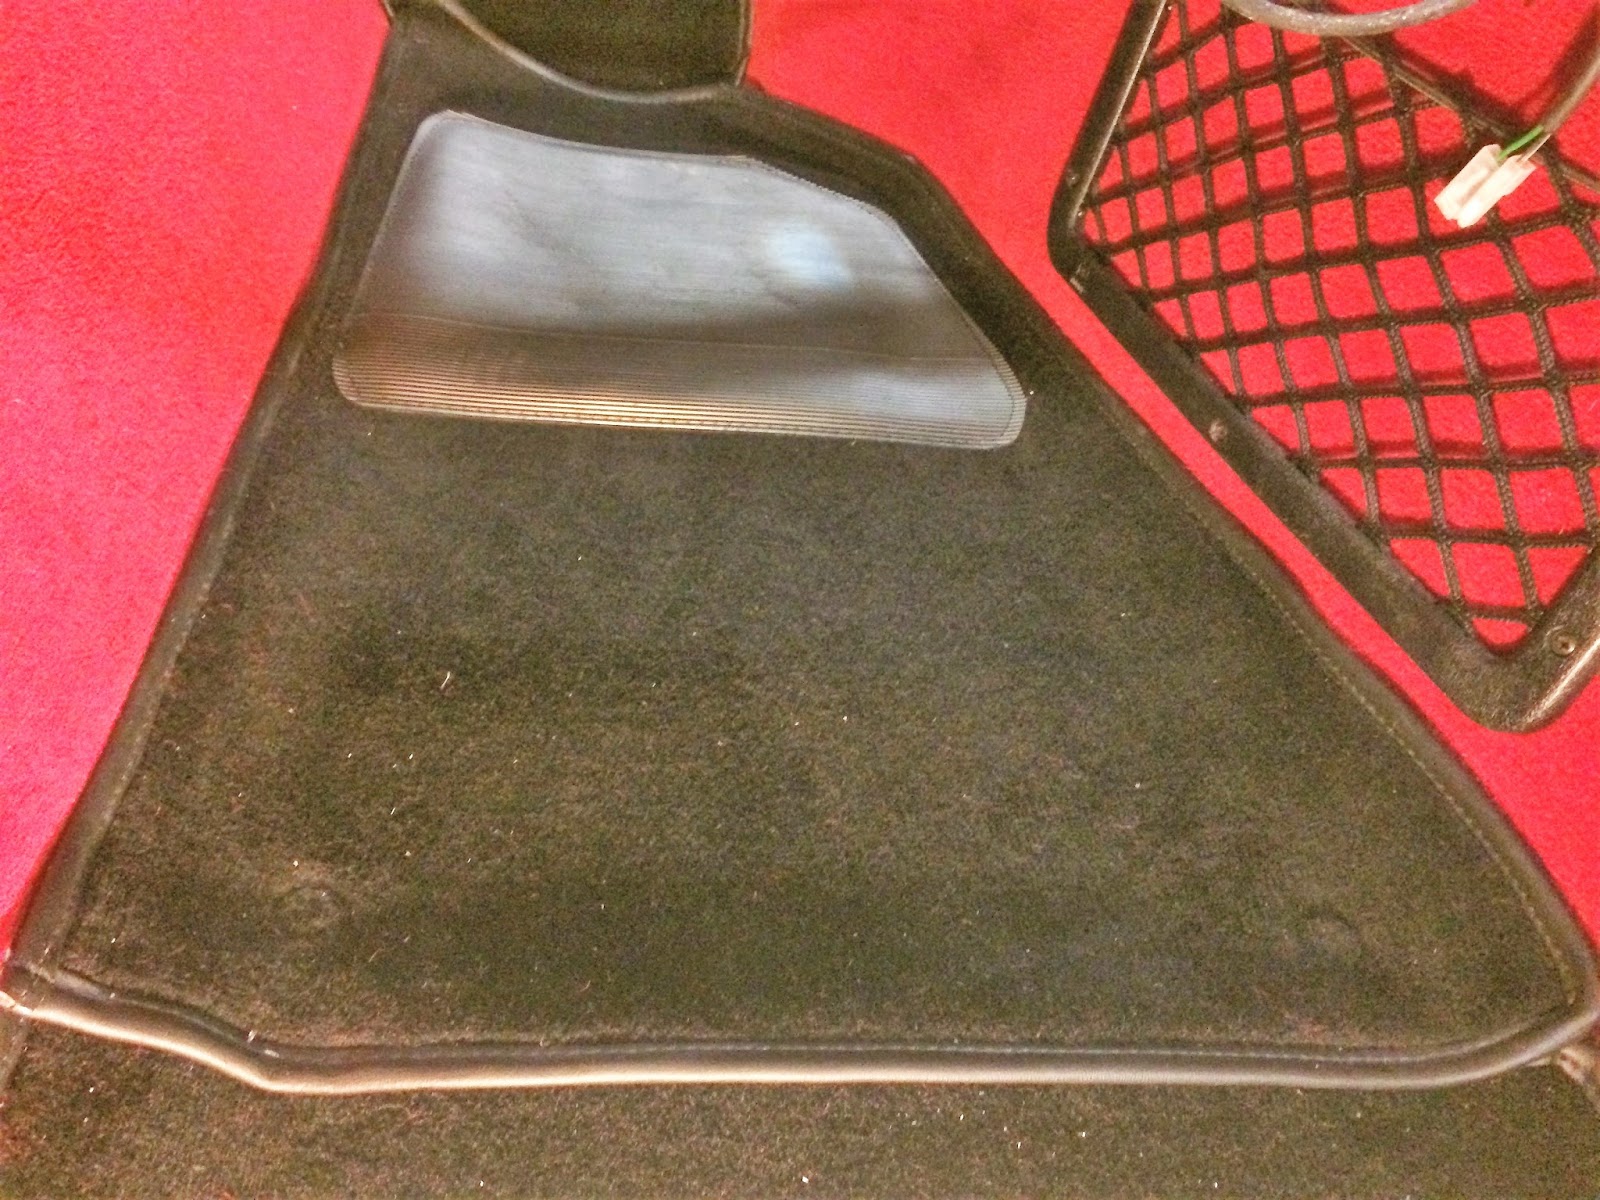
Foot well carpet securing tags

These tags are to stop the carpet moving. This is especially important on the driver's side. The fittings are made up of a press stud for the floor and two rings for the carpet.
The three parts to each fitting
One of the rings had three prongs (upper), the other has holes for the prongs to go through (under carpet). First I fixed the press stud parts to the floor using self tappers. I made sure that the studs were under the carpet and not the rubber heel pad.
Press stud on floor
Chalk was applied to the top of the press studs and transferred to the back of the carpet. The ring with the holes was placed on the underside of the carpet, over the chalk mark of the press stud. The ring with the prongs on the top side was lined up with the holes and the three prongs pushed through the carpet. The prongs were then tapped over the lower ring, trapping the carpet.
Ring on underside of carpet
Top pronged ring can be seen here - rubbing the carpet makes the ring almost disappear
So the foot well carpets are now fixed down with the press studs.
Passenger foot well carpet fixed
Door card

I had never been happy with the passenger door card fitting. So I took the opportunity to refit it in the right location. It was only a few millimeters out, but I could see it.

Sunday, January 01, 2017

Seat fixing - fitting to the car

Fixing the seats

This turned out to be a real pain and very time consuming - working out where to drill the holes to fix the runners. In the end I may end up changing the head restraints (which are currently mounted on the seat) to ones mounted on the roll over bars. Otherwise the head restraints touch the rear bodywork, the seat belts touch the head restraint and the head restraint restricts rearward seat movement - apart from that lot it is fine!

GD had supplied four fixing bolts, washers and spacers for each seat.  The long bolts and spacers go at the front of each seat. All the spacers were sprayed satin black to blend in (not that you can see them) and to reduce the risk of corrosion.

The carpets under the seats were turned back. Here I had to remove the seatbelt anchorages from the floor. A measurement from the rear bulkhead of 560 mm was used to locate the front fixing points on my seats, but check your own as Keith Akerman used 640 mm. The front hole nearest the transmission tunnel was about 75 mm from the tunnel side and about 90 mm away at the rear mounting point. A template of the bolt holes was used to determine the other location points.
Template taken from bottom of seat, marking the bolt holes
8 mm holes were drilled through the floor to take the fixing bolts. The holes I drilled in error (I had the runners in the wrong position), will act as drain holes!

The bolts were put loosely in the runners, before the seats were positioned in the car.
Bolts loosely fitted to runners
The seats were then trial fitted, before holes were cut in the carpet. Getting all four bolts through is not easy, so the rear holes were slightly larger.

The carpets were re-fitted with the seatbelt eye bolts. The holes in the floor were then marked with chalk and the carpet placed over them. The chalk was transferred on to the back of the carpet by pressing it with my fingers, before holes were cut in the carpet. Finally the seats were put in to the car and with the spacers at the front. The length of each bolt was noted, the seat removed and each bolt shortened to the appropriate length. The seats were fixed in place using the bolts, nylocs and penny washers from underneath the car.
Driver's seat fitted
Now just the passenger side to do.

Handbrake

Once the seat was in place, I could hardly get my fingers around the handbrake. I solved this by fitting a 3 mm spacer at the front handbrake mounting. Because the rear had no spacer, this caused the front of the handbrake to be move away from the car side and this created enough room to use it. Useful!!

Spacer between the handbrake and front mounting can be seen
The leather that covers the handbrake and the escutcheon were re-fitted.

Attaching the seat belts

I am fitting four point harnesses. I have had these in my Caterham and five point in my other two race cars. The five point were great in the race cars and stopped me submarining under heavy braking, but they could hurt the gentleman parts at times! So four point it was. You feel so secure with them on and they stop you moving about in the seat.

The harnesses are the clip in type in black to match the leather trim. It was simply a case of attaching them to the eye bolts on the fixings on the roll hoops and to the anchorages that I had located on the floor. The belts were then adjusted to suit me. At this point I took the opportunity to shorten one of the eye bolts so that it did not protrude from the fixing under the car.
4 point belts fixed
To keep the IVA inspector happy, I will edge the belt fixings with rubber trim to make sure that the curves are of sufficient radius.