Couldn't resist putting the seats in the car to see what they looked like!
 |
| Really happy with the look! |
Setting up the car
Next I levelled the car on axle stands. The chassis is the thing that is set to the level, not the body. It needs to be level side to side and back to front. This took hours!
Front wheels
Whilst it was up on the axle stands, I checked whether the front wheels, when on full lock, touched the inner wings. They did! So using the Dremel, I dressed the lip on the inner wing back a little to create some clearance. This was required at the front and back of the front wheels.
 |
| Small area removed from inner wing to allow tyre clearance |
Now to the butt nipping bit! I have been putting this one off, but the time has come when I can't do this any longer.
The items involved in fixing the roll over bars are the two stainless steel hoops, the saddles/brackets and the fixings. These differ from the GDJAG to the Euro, in that the fixing points have different spacing. So unlike me, do not assume that a template from a JAG will fit. It won't. You will need to make your own template if you can't blag one (not that I really needed one)!
 |
| Roll over bars, saddles and bolts |
Levelling up the chassis was important as it will allow the plumb bob to line up with the mounting vertically. The rear half of the chassis was the most important as this is where the bars are mounted. Finding flat areas of the chassis to check the level, however, was a challenge!
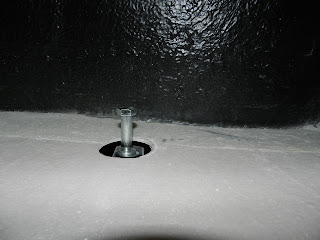
Now to some real work. A 5mm hole was drilled up through the inner front mounting point of the chassis into the boot floor. I used a 90 degree chuck adapter for the drill and plenty of dexterity to get the drill in place around the suspension! Why has no one invented a bendy drill? Next I made an undersized hole (about 40mm) with a hole saw. Finally I marked a circle using the mounting hole as a centre point and opened it up with the Dremel. I then made sure that the mounting point was in the centre of the new large hole. It was, phew!
 |
| Hole with chassis mounting point below |
 |
| First hole in [place with bolt designating the centre of the hole |

No comments:
Post a Comment