
Before I started any other work, I polished the scuttle with G6, then G3 Farecla compound so that I wouldn't catch the polishing bonnet on any new holes/slots.
The windscreen was fed in to the holes cut previously for the windscreen stanchions. This is a two person job as it is £500 + of kit and Mrs C helped here. The holes needed opening out a little to take the stanchions.
 |
| Starting to look like a car now with the windscreen fitted |
These may or may not be marked on the body by GD! Mine were not. I measured the ones on Keith Akerman's car, pre-marked by GD, to get the positions.
First I put some masking tape on the scuttle where the demist vent would go. The outer screw hole of each vent were positioned 220mm in from the windscreen mounting hole, 80mm back from the cockpit roll (measured at the centre line of the vent hole). The second hole was marked through the demist escutcheon. The end furthest from the windscreen stay was also positioned 80mm from the roll. I checked the measurements from a centre line just to be sure. I had used different measurements each side! Luckily I measured twice and cut once!
 |
| Centre line marked on the scuttle |
 |
| Demist vent with the escutcheon fitted |
The cut out edges of the demist slots were spray painted satin black, before the escutcheons were fitted and bolted though to the fish tail part of the demist vents (holes already tapped in the fish tail vents).I also painted the side vents in the wings whilst I was on with it.
 |
| Off side dummy 'vent' painted in satin black |
 |
| Fishtails can be seen mounted here under the scuttle |
 |
| Demist pipes in place |
Pedal box
Using a fly by wire pedal for the Chevy LS engine is not straight forward on the GD Cobra.
The fly by wire pedal cannot be used as it is, because there is insufficient space in the driver's foot well to use it as it is and its travel is not enough for a progressive pedal. Instead it needs to be adapted and mounted in the off side wheel arch compartment, at the other side of the driver's foot well. A bar is used to connect the electronic pedal to the accelerator pedal on the GD pedal box.
The GD pedal box was installed as normal, after drilling a 6mm hole in the accelerator pedal 10mm down the top part of the accelerator pedal and in-line with the pivot bar i.e. 90 deg to the pedal travel. This was a tricky job and require a drill stand and a drill clamp to hold the pedal - drilling a 6mm hole in a 10mm round bar was not easy! I used gradually bigger drill bits to make the hole.
A 20mm hole was then drilled through the bulkhead in line with the rose joint. I got this wrong the first time and will cover up my mistake with a bolt and washers to fill in the hole!
 |
| Bar attached to the accelerator pedal - correct hole marked! |
The foot plate on the electronic pedal was removed. The electronic pedal arm was shortened to fit in the compartment and a new hole drilled. However, I kept the arm as long as possible.
 |
| Pedal arm shortened and 6mm hole drilled |
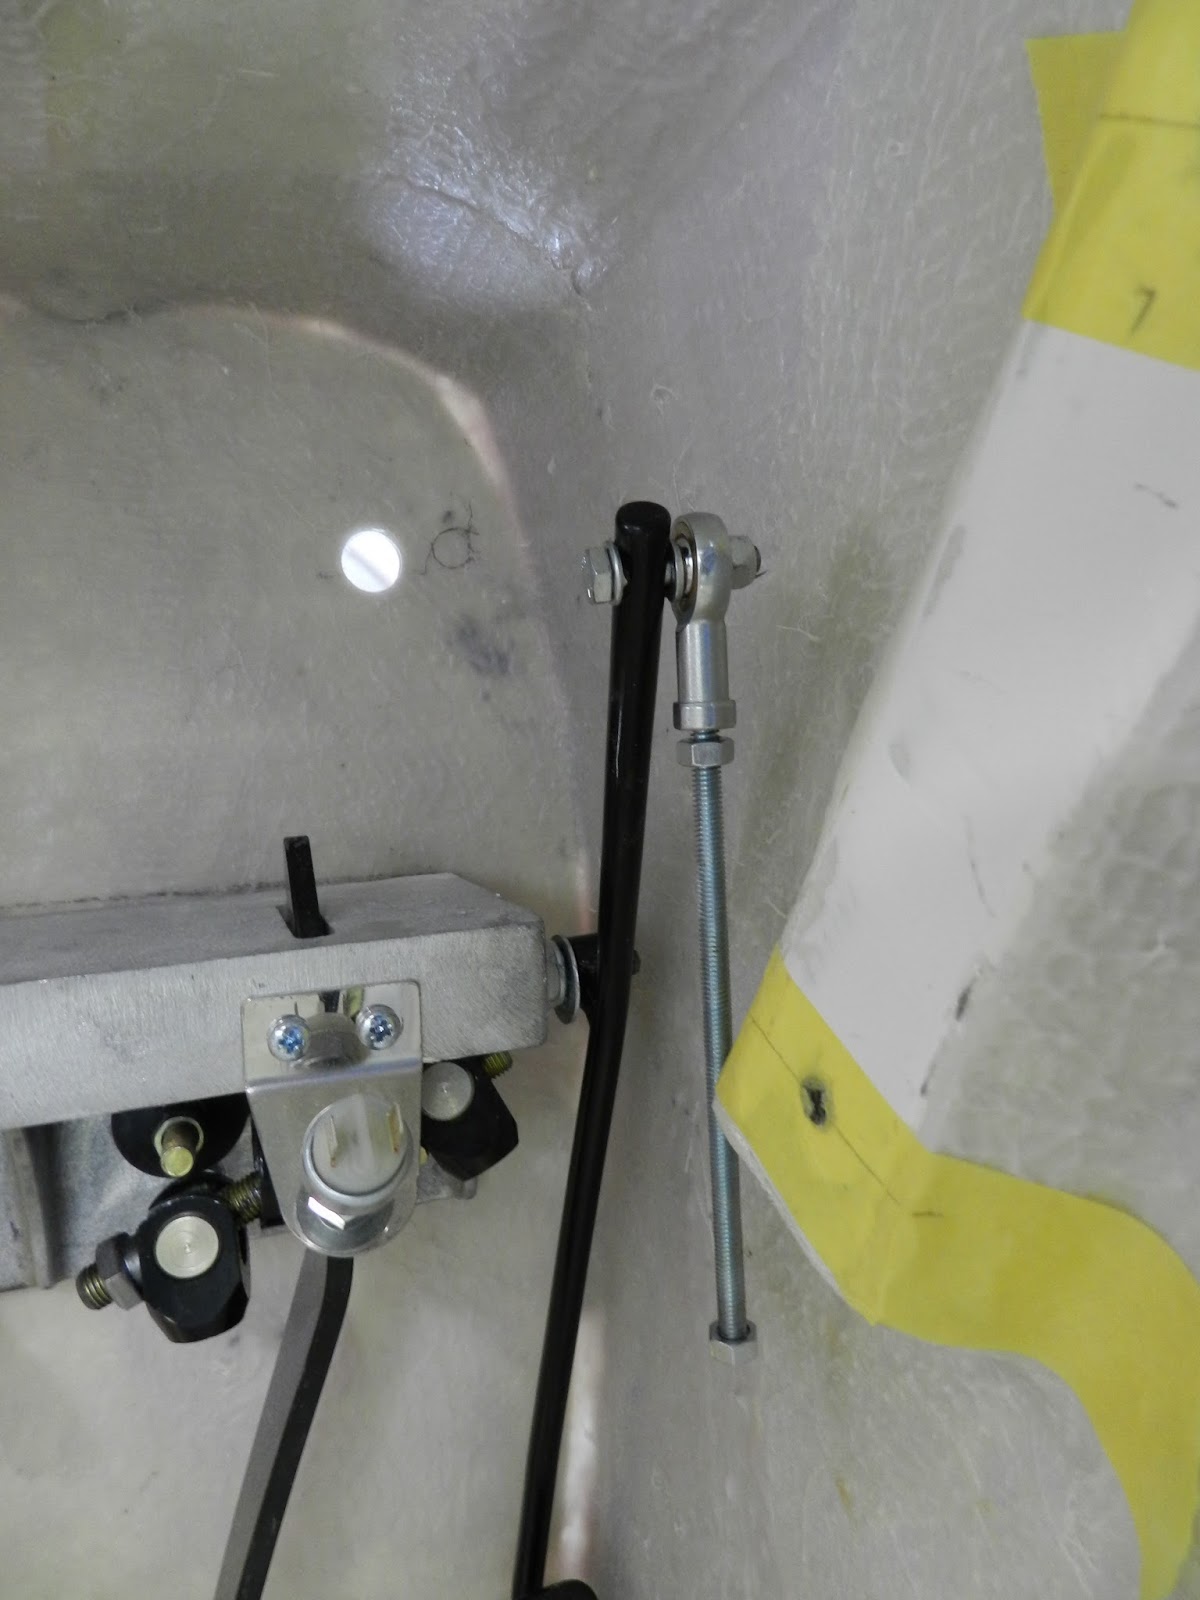
The threaded bar has the two rose joints attached one at each end. Lock nuts are used to secure the rose joints in their final place. One end of the bar was fed through the hole in the bulkhead and attached to the accelerator pedal using a 6mm bolt through the rose joint and the other end was attached to the modified electronic pedal using another 6mm bolt through the other rose joint.
No comments:
Post a Comment